Saturday, April 28, 2012

Mast-Making: The Eureka Moment


I've tried various things to clamp my mast in place while allowing it enough give to turn when a reasonable degree of pressure is applied.

I attempted to clamp it (this failed; every clamp in my arsenal is intended to attach rectangles to other rectangles; they either fall off or need to be constantly adjusted.)  

I attempted to screw its ends into sawhorses and make it turn like a 10' lathe (the screws came loose or simply snapped.)

May have found a simple solution; place the mast on the sawhorse and sandwich it between two chunks of 2X4.  Adding a shop cloth makes it a little less wobbly and protects against gouging and scratching.

Friday, April 27, 2012

Great Lakes History

According to the journal of David Wingfield (officer of the RN in the War of 1812,) there used to be ice on Lake Huron as late as mid-June.  I know the air on Superior can be in the 40's into mid-July (when I was out on the Hjordis,) but can't imagine ice that late.

http://www.amazon.com/Four-Years-Great-Lakes-1813-1816/dp/1554883938/ref=sr_1_2?ie=UTF8&qid=1335532457&sr=8-2

Wednesday, April 25, 2012

Mast Making: Knotty Procedures

I'm not sure if there's a SOP for knots when it comes to mast making. Perhaps the protocol is "just don't buy wood with knots in it." Perhaps making a mast out of a recently felled Sitka Spruce (as opposed to a kiln-dried construction-grade 4X4) would make the knots less likely to rattle their way out as the mast is shaved and sanded into shape.

I personally chose to ignore some knots (like the top one) because they were too shallow to be much of a consideration. One other (the one at bottom) was too deep to be ignored, and has been braced with epoxy and a little scrapwood.If the mast breaks in the middle of the lake and someone takes a gaff to the eye (and dies,) I guess we'll know I did something wrong.

Tuesday, April 24, 2012

There's Little Difference Between Tradition and Frugality


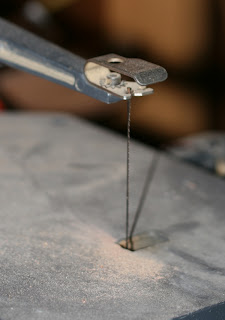
Just finished fine-tuning the form of the pram's rudder on my grandfather's old hobby saw. Beveled it down with a 60 grit on my RO sander, then polished it up with a 120 grit.

Mast Making (cont)

Found that drawing a circle on either end of the mast can be extremely helpful in getting a general idea of its curvature in relation to your notion of a perfect circle.

Monday, April 23, 2012

Mast making Pt 4: Getting the Mast to Turn (Controllably) while working on it.

I've tried a lot of ways of anchoring the mast, and generally speaking, if you're not too worried about turning it while you're working (this is almost a must when sanding,) I found that l-clamps work the best.  During the sanding process, I attempted to screw it into the saw horses.  This was somewhat difficult as getting it screwed into the center point of the mast was difficult, and depending on which way you turn, the screws will generally want to either want to tighten or come loose.  That being said, it worked alright.

Here's the process I used:

  1. Center the sawhorses, and make a lateral line on them.
  2. Measure up a certain amount from the floor.  Where this line crosses the lateral line, drill a hole.  Make sure the hole is level.
  3. Drill a level hole through the centers of the mast.
  4. Screw through the sawhorses into the center hole of the masts.
This is really pretty simple, though I could have improved it by using bolts and washers (to allow the bolts and mast to turn together,) and by bracing the horses with sandbags to keep them steady.

Update: This failed.  Badly.  The screws came loose or snapped altogether.  Considered bolts, but this would have meant boring fairly large holes into the ends of the mast.  Figured out a fairly simple solution here.

Sunday, April 22, 2012

Mast making Pt 3

While there's something almost therapeutic about hand planing, I've come to respect the conveniences of a power planer. Not only is it faster, but you can easily control the exact depth of the planing blade. Mast is more of a slightly tapered tube now. While the base had to be fairly exact to fit the seat and mast step, the tapering at the peak (which has less exact specifications,) was more instinct and guesswork. Bottom is sanded with 60 grit; next weekend will involve finishing the tapering, then sanding the peak with 60, then the whole thing with 120 grit.

Saturday, April 21, 2012

Mast making Pt 2

My 10' 4X4 is looking more hexadecagonal. This involved drawing circles of various sizes on the 4 original faces, dividing those circles into four, drawing lines through the points... you know what, let's just say that in the end, two compasses, a vernier caliper, a 4' rule, a straight-edge, a power plane, and a lot of bad words were involved.

Monday, April 16, 2012

Masts and things

New halyards and sheets for the Springtide. Made slip arrangements as well. Have been planing down the Amanda Louise mast out of a solid 4X4. I made one attempt with Wooden Boat Works' instructions for cutting the Peapod mast, but found it was too difficult to get the equal angles with a table saw. Ended up using the instructions found here. While I made an honest go with a hand plane, I ended up using the power planer in the end, and it went pretty smoothly.

Sunday, April 8, 2012

Mastmaking

The pile of sawdust created doing a rough-cut of the mast. Took out the SpringTide's running rigging to get it replaced. Believe it may be what came with the boat - getting pretty brittle.